This is an overview of setting up the Connectino for the first time.
Power Supply
The Connectino can be powered by Micro USB or with a mains adapter. To power up the Connectino simply plug in the Micro USB cable and wait for a blue LED to turn on, this indicates that the access point is available and that you can now connect to your Connectino (possible LED states) . You should also see a blinking LED near the power connector, this is the heartbeat LED, indicating that the WLAN module is up and running.
Connect with your computer
If you want to test the Connectino from within your cozy bed, without moving to your desk and turning on your computer, you can Connect with your Smartphone instead.
Using a computer just open your Wi-Fi settings and choose the access point of the Connectino. It’s name is “Connectino”. If you have multiple devices running it is “Connectino” appended by the last four characters of the MAC address to differentiate.
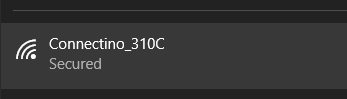
Select the Connectino entry and enter the password for the secured connection which is “Connectino” (case sensitive).
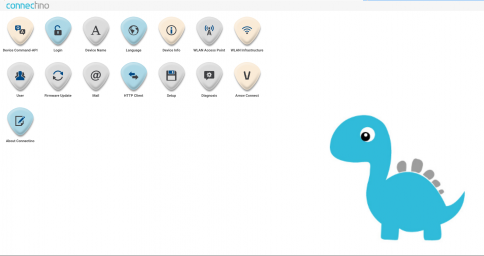
Now open your browser and type into the addressbar: “connectino.local” or type in the Connectinos IP-addess (standard on old Firmware: “192.168.1.1”; on Firmwareversion > 1.1: “192.168.42.1”). You are now on the home page of your Connectino where you are able to set up the configuration of the different modules. If the connection times out or cannot be established check your network connection. You need to be connected to the Connectino.
User Management/Login

The Connectino has a user account management to secure the configuration and control. To change the configuration and control the Connectino you need to log in. Use the Login module as seen on the right. Use user name admin and password admin to log in. We recommend to at least change the password. For such user configuration use the user module as seen on the left.
Connect your Connectino to your home network
Use the website or app to connect your Connectino to your network.
The Connectino has two WLAN interfaces. One is the access point where you already connected to, to access the website and the other one is the infrastructure interface. With this interface the Connectino itself connects to a wireless network. Both interfaces can be used simultaneously.
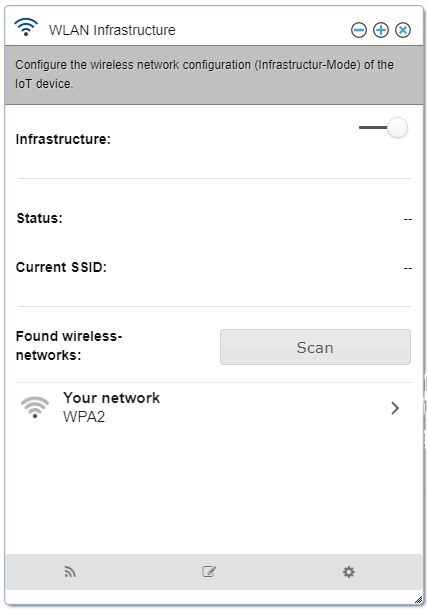
To configure the interface select the WLAN infrastructure icon as seen to the right. The WLAN infrastructure configuration window will appear as seen in the picture below. Activate the interface with the slider at the top and then use the “Scan” button to search for WLAN networks nearby. After the scanning process finishes you will have a list at the bottom with available networks. Select your network and enter the password and select the blue button.
The status in the top will now change to “Establish a connection”. Once the module connected successfully the status will change to “Connected”.
Setup the Arduino IDE
This chapter will guide you through the setup process of the Arduino IDE. After going through this process you will be able to upload your sketches from the Arduino IDE to your Connectino by using the USB connection and via WiFi. We assume you already installed the Arduino IDE from the Arduino webside.
Add the Connectino Library to the Arduino IDE
With the Connectino library you can access the internal functions to easily communicate over all provided interfaces.
To always get the newest update on the Connectino library you can add it to the Arduino IDE internal “Board Manager”. To do so:
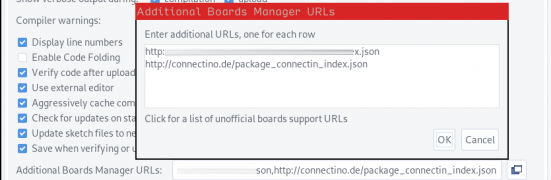
- copy the URL:
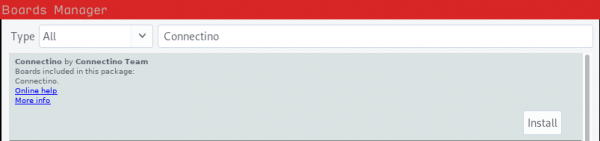
http://connectino.de/software/package_connectino_index.jsoninto File→Perferences→Additional Board Manager URLs - open Tools→Board→Boards Manager… and filter for “Connectino”
- hit install and you are done
Now your Arduino IDE is set up and ready to be used with your Connectino board.
Upload an Example Sketch to the Connectino
You can now upload an example sketch. For this Tutorial we will use „Blink“ from the default Arduino examples under „File→Examples→01.Basics“. You have two options for uploading the sketch. You can connect your Connectino to an USB port of your PC or upload the sketch via WiFi, as shown in the next step.
Upload your Sketch via WiFi
To upload the sketch with your WiFi connection you need to set up your Connectino correctly. If you used the USB upload before, make sure your Jumpers are set correctly.
In the menu „Tools→Port“ you should now see two categories. Serial ports and Network ports. Select your Connectino from the Network ports section as seen in the picture, the IP address itself can differ.
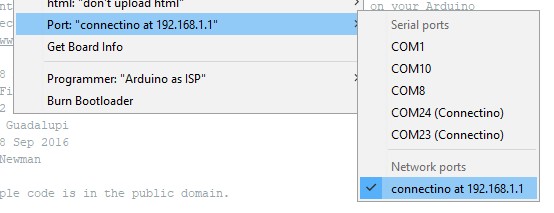
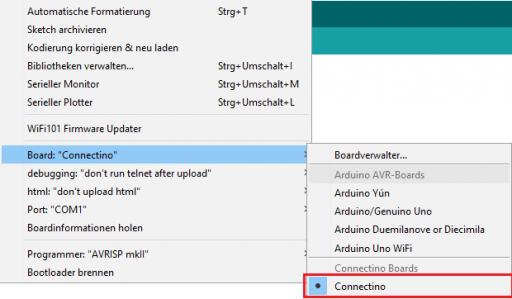
To use the right uploading tool for the Connectino go to Tools→Board: “Selected board”→Connectino.
The network upload script uses python 3, so be sure you have installed it and added Python to PATH. You also need to install additional libraries for python, these are: requests, pyserial, PyCRC and intelhex. You can install these with the python packet manager pip, which gets installed together with python. If you installed multiple versions of python make sure your python --version and your pip --version use the same version of python.
To install the necessary python libraries type as administrator on the command line:
pip install pyserial requests pycrc intelhex
If you need help, there are many tutorials online which show you how to install libraries for python and how to manage different python versions.
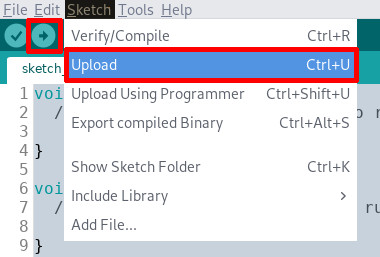
After selecting the connectino entry you are now able to upload the sketch. You can do this by either click on one of the below marked buttons or by pressing Ctrl+U.
When the upload finished successfully you should see this output in the log window of the IDE:
Status: Update finished