Abstract
We already explained how to get your website onto the Connectino in a previous tutorial. Now, in most cases you also want to communicate between the Sketch and the website you created. This tutorial will show you how to do exactly that, with an example as basic as possible.
You can download all the files for this tutorial from our website.
Requirements
For this tutorial we assume the following:
- You got a Connectino set up as described in our Initial Setup Guide .
- You know how to perform a Connectino Software Update.
- You know how to bring your webside onto the Connectino.
Structure

The basic concept on how the communication works, is quite easy to understand and can be divided into 6 steps:
- Your webbrowser will ask the Connectino’s inbuild webserver for the requested website.
- The webserver returns and your browser displays the website.
- You trigger the querying JavaScript-function (e.g. by pressing a submit-button) and your browser sends a request with a specific JSON to the connectino.
- The Connectino receives the JSON, parses the necessary information out of it and sends the parameters to the Sketch.
- The Sketch processes the information and calls a
respond()-function, to send an answer. - This answer is handed to the webserver, and will be sent to the webside again as a JSON.
Goals
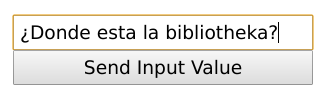
At first as the most basic example we will use a webpage, with only an input-field and a button to submit.
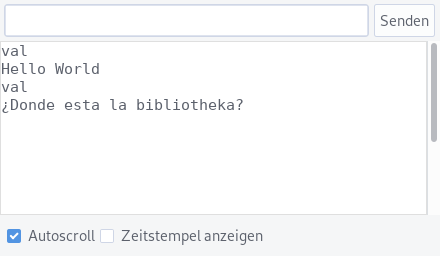
This data will be sent to the Connectino, where we read it and print it on a debug-output.
In the second part of the tutorial we answer from the Connectino with a string, that will be received on the website and displayed below the submit-button.
Send data from your Website to the Connectino
At first we just implement one-way communication from the webpage to the Connectino. For this a script that sends the right data to a specific file on the Connectino’s internal webserver and a sketch reading the received message is needed.
Webpage to send data
<!DOCTYPE html>
<html>
<head>
  <title>Connectino - Custom - Web</title>
  <!-- just to push it to the center -->
  <link href="css/style.css" rel="stylesheet" type="text/css">

  <!-- adding jQuery -->
  <script src="script/jquery.min.js" type="text/Javascript"></script>
  <script src="script/semantic.min.js" type="text/Javascript"></script>

  <script type="text/Javascript">
    // path to the file on the webserver to send the JSON-string to
    var _szFileRequest = "/ajax/cfgpars.json?rauth=0x00";

    function sendValue()
    {
        var reqData; // string that will be sent to device
        var COMMAND = "send"; // send or query something
        var MODUL = "binuart"; // device module
        var VARIABLE = "val";
        var DATA = $('#myinput').val(); // data to send

        // convert the JS-datastructure into a JSON-string
        reqData = JSON.stringify({CmdArr: [[COMMAND, MODUL, VARIABLE, DATA]]});

        // build ajax request
        jQuery.ajax('' + _szFileRequest,
            {
                data: reqData,
                dataType: 'json',
                contentType: "application/json",
                type: 'POST',
                success: function(data, textStatus, jqXHR)
                {
                    console.log("Send successful");
                },
                error: function(jqXHR, textStatus, errorThrown)
                {
                    console.warn("Send error");
                }
            }
        );
    }
  </script>
  </head>
  <body>
    <div>
        <input id="myinput" type="text" placeholder="Enter value">
        <button onclick=sendValue()>Send Input Value</button>
    </div>
  </body>
</html>
The code above can be divided into 3 main parts. First there is the “including”-part in the html-head. The .js-files are needed to enable jQuery for our ajax-request-script. The .css file of course is not essential for the example to work.
The second part is the actual script communicating with the Connectino. We will just need one function (here sendValue()) constructing the JSON-string and defining and sending the HTTP-request. There are 4 variables defined at the top:
- COMMAND: necessary to tell the Connectino what to do, we will later change
sendtoquery, to get an answer. - MODUL: at this time
binuartis the only option here. - VARIABLE: this is a value you are able to define yourself. It will be the first value you receive in your sketch.
- DATA: This is just to show, how you can send multiple values, of course you can remove this from the JSON and will still receive the VARIABLE in your Sketch. It will be the second value you get on the Connectino.
- You could add more values to the JSON-string, but we will work with 2 variables for now.
At last you need an input-element to insert data into and a button to trigger the sendValue()-function.
“Receive sended data”-sketch
#include "ConnectinoCmd.h" // Library for Communication with the Connectino
#include "SoftwareSerial.h" // Necessary for Connectino

uint16_t cmdLen = 0; // the length of the command
char cmdBuff[32] = ""; // buffer for receiving data

ConnectinoCmd cmd = ConnectinoCmd(StxSerial);
SoftwareSerial debug = SoftwareSerial(4,5);

void setup() {
    StxSerial.begin(115200);
    StxSerial.add(cmd);

    pinMode(13, OUTPUT);

    debug.begin(9600);
}

void loop() {
    if (cmd.dataAvailable()) // check if data was received
    {
        cmd.getData(cmdBuff, cmdLen); // read received data
        debug.println(cmdBuff); // print read data
        digitalWrite(13,HIGH);
    }
}
This example sets the serial connectino to the command-interface in the setup(). The loop() checks the interface for available data and fetches and prints it, if available. So with the example page from above it should always print:
val
<THE VALUE YOU ENTERED IN THE FORM>
Additionally the onboard-LED is turned on as an indicator, that at least one message was received.
Query data with your Website
Send query with Javascript
To query data from your Connectino you actually just have to change one of the JSON-parameters. Changing one line from the example above is enough to trigger this function on the Connectino.
// change:
var COMMAND = "send";
// into:
var COMMAND = "query";
Respond sketch
The sketch now expects you to answer. Do this with the highlighted line below.
#include "ConnectinoCmd.h" // Library for Communication with the Connectino
#include "SoftwareSerial.h" // Necessary for Connectino

uint16_t cmdLen = 0; // the length of the command
char cmdBuff[32] = ""; // buffer for receiving data

ConnectinoCmd cmd = ConnectinoCmd(StxSerial);
SoftwareSerial debug = SoftwareSerial(4,5);

void setup() {
    StxSerial.begin(115200);
    StxSerial.add(cmd);

    pinMode(13, OUTPUT);

    debug.begin(9600);
}

void loop() {
    if (cmd.dataAvailable()) // check if data was received
    {
        cmd.getData(cmdBuff, cmdLen); // read received data
        debug.println(cmdBuff); // print read data
        digitalWrite(13, HIGH);
        cmd.respond("received"); // respond with a string
    }
}
Receive response in Javascript
To now actually get the answer to work with add the highlighted lines below.
<!DOCTYPE html>
<html>
<head>
  <title>Connectino - Custom - Web</title>
  <!-- just to push it to the center -->
  <link href="css/style.css" rel="stylesheet" type="text/css">

  <!-- adding jQuery -->
  <script src="script/jquery.min.js" type="text/Javascript"></script>
  <script src="script/semantic.min.js" type="text/Javascript"></script>

  <script type="text/Javascript">
    // path to the file on the webserver to send the JSON-string to
    var _szFileRequest = "/ajax/cfgpars.json?rauth=0x00";

    function sendValue()
    {
        var reqData; // string that will be sent to device
        var COMMAND = "query"; // send or query something
        var MODUL = "binuart"; // device module
        var VARIABLE = "val";
        var DATA = $('#myinput').val(); // data to send

        // convert the JS-datastructure into a JSON-string
        reqData = JSON.stringify({CmdArr: [[COMMAND, MODUL, VARIABLE, DATA]]});

        // build ajax request
        jQuery.ajax('' + _szFileRequest,
            {
                data: reqData,
                dataType: 'json',
                contentType: "application/json",
                type: 'POST',
                success: function(data, textStatus, jqXHR)
                {
                    console.log("Send successful");
                    $('#myoutput').text(data.CmdArr[0][3]);
                },
                error: function(jqXHR, textStatus, errorThrown)
                {
                    console.warn("Send error");
                }
            }
        );
    }
  </script>
  </head>
  <body>
    <div>
        <input id="myinput" type="text" placeholder="Enter value">
        <button onclick=sendValue()>Send Input Value</button>
        <p id="myoutput"></p>
    </div>
  </body>
</html>
With these scripts you should now be able to access your Connectino over websites and other HTTP-based technologies, like smartphone-apps and control it using Arduino Sketches. To upload your webside follow our Upload Tutorial
If you want some examples for other input-field-types try our advanced Connectino website Tutorial.
You can download all the files for this tutorial from our website.
TUTORIALS