Abstract
Today you will learn, how fast the communication to your Connectino can be. Our goal is to control a remote car with your smartphone over a WiFi connection. We already prepared an app so you just have to flash the sketch to your Connectino and get started.
Requirements
To setup the Arduino IDE for Connectino please use our Quick-Start-Guide available at: Initial Setup
You will need a Connectino and a remote car which is suited for being controlled with Arduino like boards.
This tutorial was verified to work with the following software versions of the Arduino library and WiFi module firmware:
- Arduino Library: 1.0
- Wifi module firmware: 1.0 and 1.1
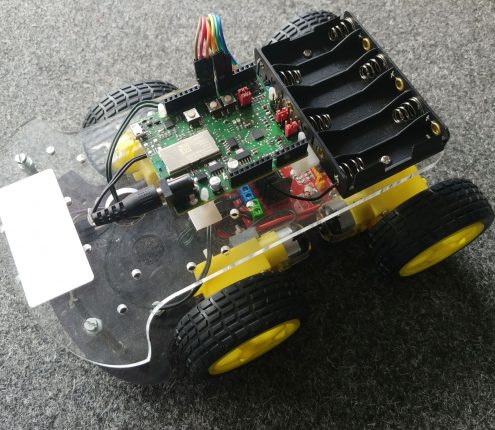
Hardware Setup
As most remote cars are a little different in how to set them up, we won’t show an explicit way here. Just refer to the manufacturers manual.
Code
Setup Function
In the setup method the AJAX module needs to be initialized and the motors enabled. Define the output-pins for your car, as it is described in it’s manual.
Loop Function
Now to control the cars movement in the loop method you need to check if any data is available on the AJAX module. Get the data and set the motor movement depending on the numpad command which the smartphone app has sent.
Helper Functions
To control the motors and the movement of the car, it is useful to define some helper functions. If you got a different remote car you can just modify these functions and the rest of the sketch will work the same. You can adjust the used pins in the define section at the top of the code. In most cases only the moveXforward/moveXbackward functions need to be customized.
Sourcecode
#include <ConnectinoAjax.h>

//Motor B
#define ENABLEB 4 // no PWM Forward | Backward | Break
#define PINB2 5 // IN4 PWM High | Low | High
#define PINB1 6 // IN3 PWM Low | High | High

//Motor A
#define PINA2 10 // IN2 PWM Low | High | High
#define PINA1 11 // IN1 PWM High | Low | High
#define ENABLEA 12 // no PWM

ConnectinoAjax ajax = ConnectinoAjax(StxSerial);
// variables to get ajax cmd
char ajaxCmd[64] = "";
uint16_t cmdLen = 0; // the length of the command (not used)

//Move motor A forward with given speed
void motorAforward(int speed)
{
analogWrite(PINA1, speed);
digitalWrite(PINA2, LOW);
}

//move motor A backward with given speed
void motorAbackward(int speed)
{
digitalWrite(PINA1, LOW);
analogWrite(PINA2, speed);
}

//Move motor B forward with given speed
void motorBforward(int speed)
{
analogWrite(PINB1, speed);
digitalWrite(PINB2, LOW);
}

//move motor B backward with given speed
void motorBbackward(int speed)
{
digitalWrite(PINB1, LOW);
analogWrite(PINB2, speed);
}

//enable or disable both motors
void motorState(bool state)
{
digitalWrite (ENABLEA, state);
digitalWrite (ENABLEB, state);
}

// move car with given speeds
void move(int speedR, int speedL)
{
if(speedR >= 0) motorAforward(speedR);
else motorAbackward(abs(speedR));

if(speedL >= 0) motorBforward(speedL);
else motorBbackward(abs(speedL));
}

void coast()
{
digitalWrite (PINA1, LOW);
digitalWrite (PINA2, LOW);
digitalWrite (PINB1, LOW);
digitalWrite (PINB2, LOW);
}

void handBreak()
{
digitalWrite (PINA1, HIGH);
digitalWrite (PINA2, HIGH);
digitalWrite (PINB1, HIGH);
digitalWrite (PINB2, HIGH);
}

void setup()
{
//configure Motor pin modes
pinMode (ENABLEA, OUTPUT);
pinMode (PINA1, OUTPUT);
pinMode (PINA2, OUTPUT);

pinMode (ENABLEB, OUTPUT);
pinMode (PINB1, OUTPUT);
pinMode (PINB2, OUTPUT);

// initiate the ajax-serial
StxSerial.begin(115200);
StxSerial.add(ajax); //Control a Remote Car With Connectino

// Start the engine
motorState(true);
}

void loop()
{
// Get a command from the Ajax Serial
ajax.dataAvailable() && ajax.getData(ajaxCmd, cmdLen);

switch ((int)ajaxCmd){
case '1': //backleft
move(-255, -150); // change speed of motors
break;
case '2': //back
move(-255, -255); // change speed of motors
break;
case '3': //backright
move(-150, -255); // change speed of motors
break;
case '4': //left
move(10, 255); // change speed of motors
break;
case '5': //stop
handBreak();
break;
case '6': //right
move(255, 10); // change speed of motors
break;
case '7': //forwardleft
move(150, 255); // change speed of motors
break;
case '8': //forwardright
move(255, 150); // change speed of motors
break;
case '9': //forward
move(255, 255); // change speed of motors
break;
}

ajaxCmd[0] = 0;
};
Smartphone App
Connect device
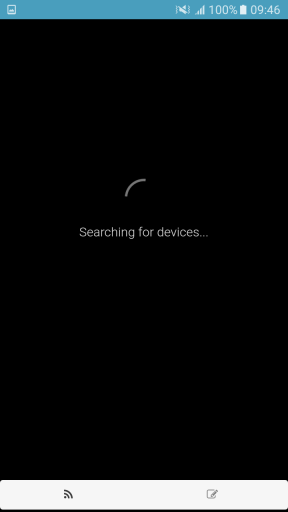
When started the app will automatically search for Connectino devices in the connected local network. If it is not found make sure the have the Connectino and your smartphone connected to the same network.
User interface
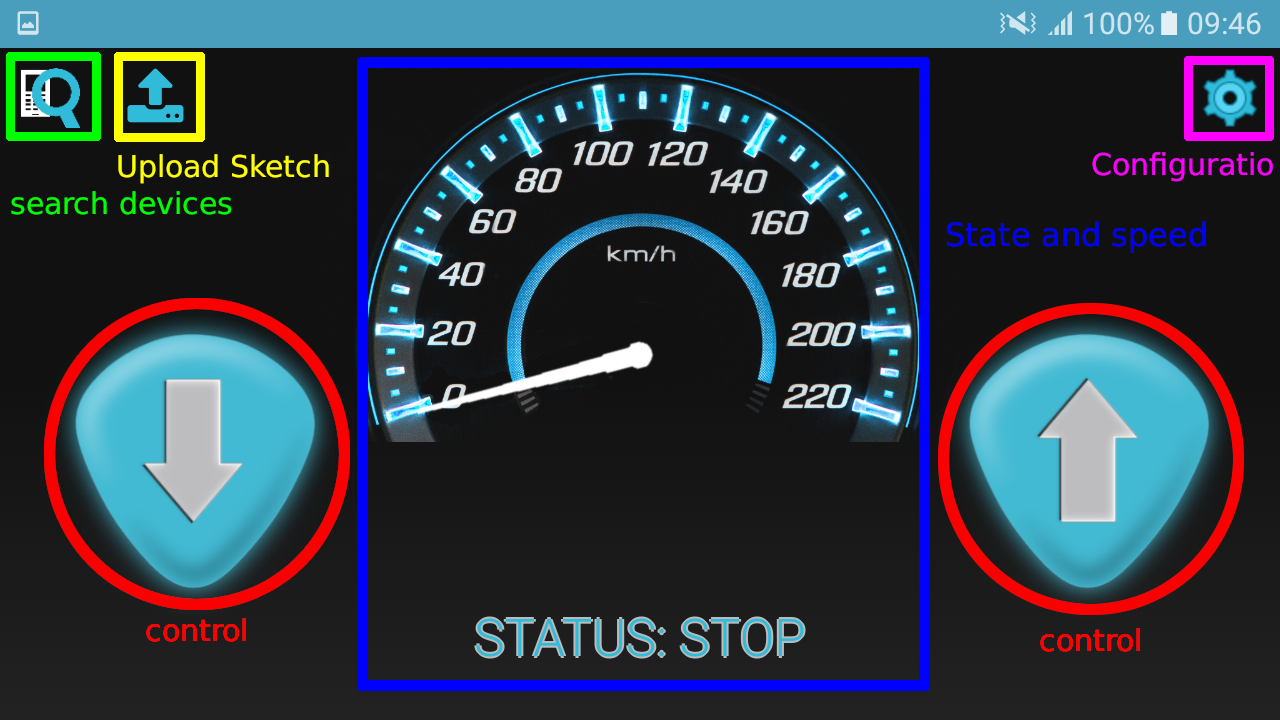
Configuration: For further configuration of the Connectino the Connectino app will be started. If you have not installed it yet, the playstore will be opened.
State and Speed: These fields show you the acutal status of the car and the speedometer will move if you accelerate.
Upload Sketch: Upload the example sketch to the connected Connectino.
search devices: You can restart the device search, from when you started, to find other Connectinos in your network.
control: To drive forward or backward press the according buttons. To change the direction lean your phone.
Download the Connectino Car Control App:


Conclusion
You see, that controlling devices with your smartphone and Connectino, is fast enough even for remote controlling. That way you can control your robot projects from your smartphone without worrying about latency.
TUTORIALS